Recent Posts
Link
250x250
오늘보다 더 나은 내일의 나에게_
비전공자의 IoT 국비 교육 수강일지 Day_39 본문
728x90
정보처리기사 필기
소프트웨어 생명주기(Lifecycle)
요구사항 분석 - 설계 - 구현 - 테스팅 - S/W 패키지
1과목
Chap 01. 요구사항 확인
1. 현행 시스템 분석
2. 요구사항 확인
3. 분석 모델 확인
요구사항 RFP(Request For Proposal)
- 문제의 해결 또는 목적 달성을 위하여 고객에 의해 요구되거나, 표준이나 명세 등을 만족하기 위하여 시스템이 가져야 하는 서비스 또는 제약사항
- 고객이 요구한 사항과 요구하지 않았더라도 당연히 제공되어야 한다고 가정되는 사항들
플랫폼 => 작업대로 볼 수 있다.
Arduino Wemos 보드
: ESP32 (Wifi, Bluetooth)
(ESP8266 보드가 민감해서 사용하기 어려움)
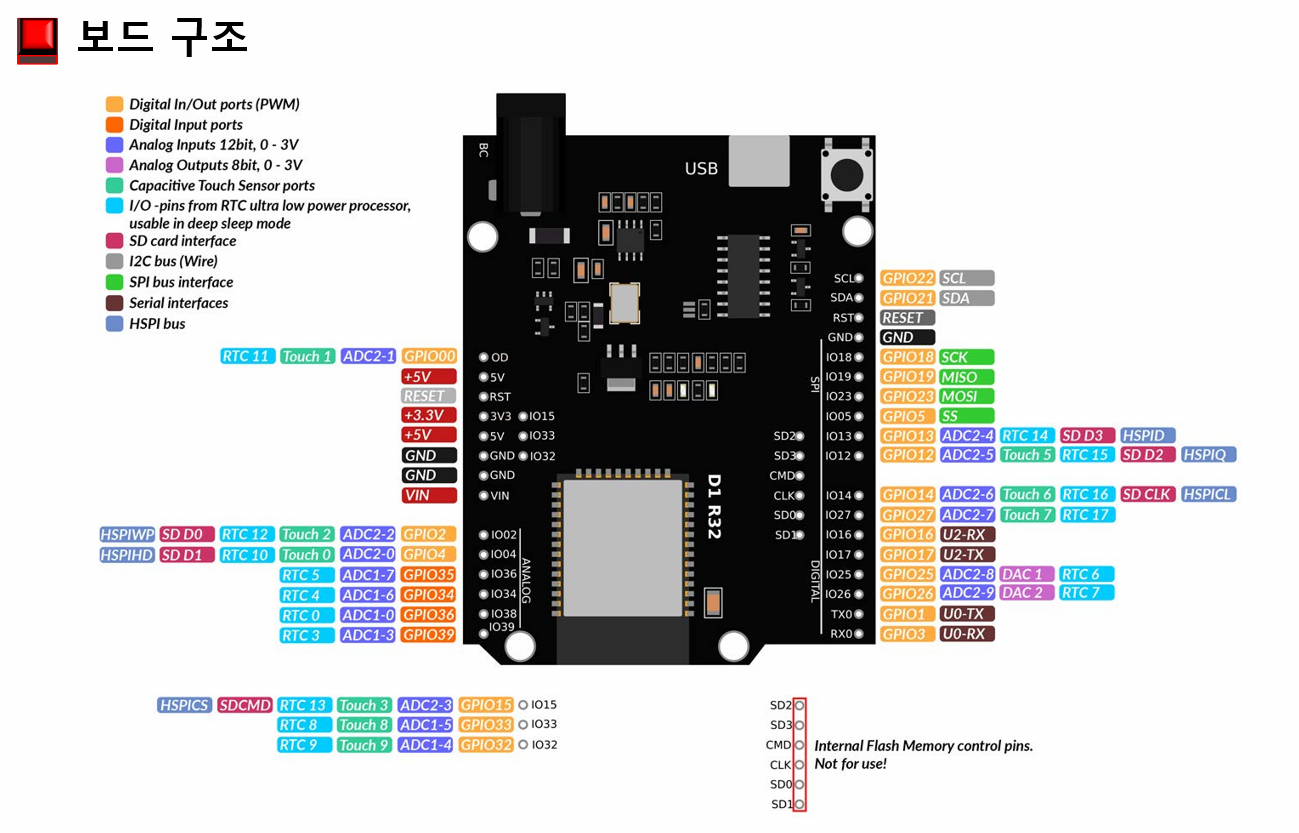
우측 노란색 부분 PWM사용 가능
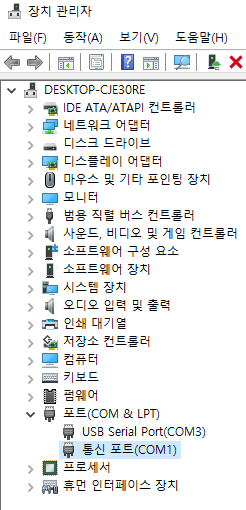
=> ESP32 보드 드라이버 설치

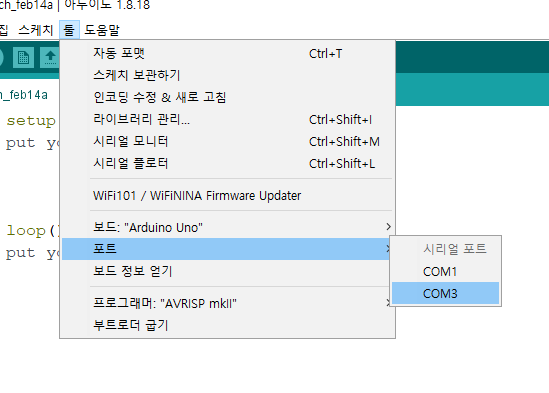
=> 드라이버 설치 후 ESP32 보드 컴퓨터 연결 후 포트 확인_USB Serial Port(COM3)

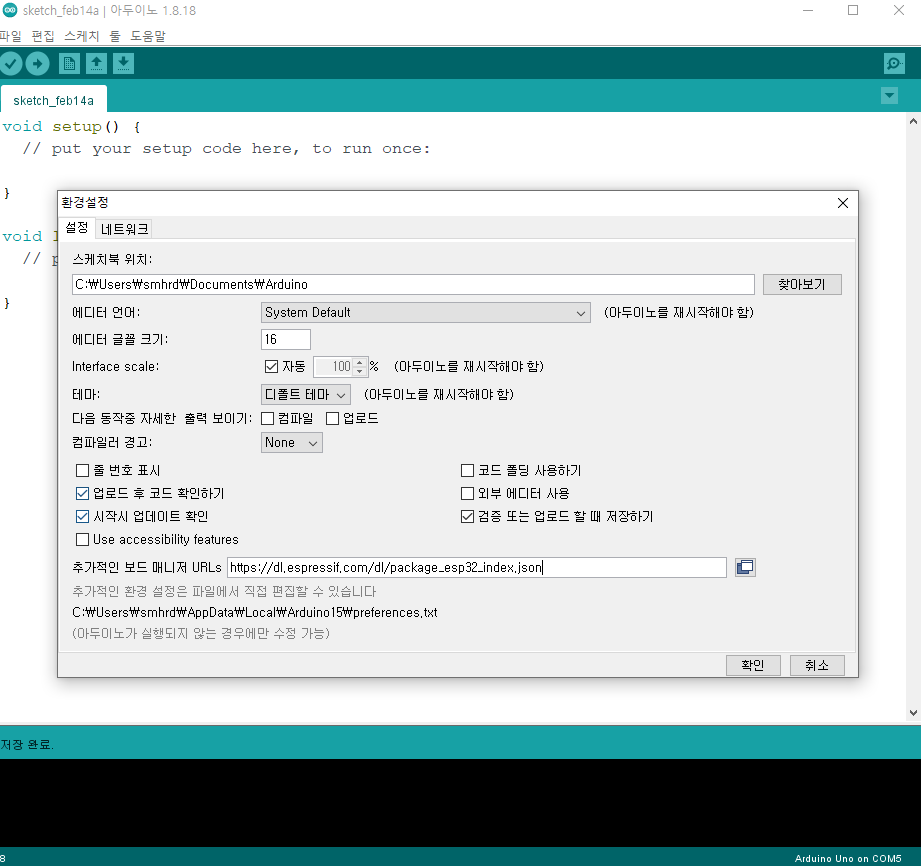
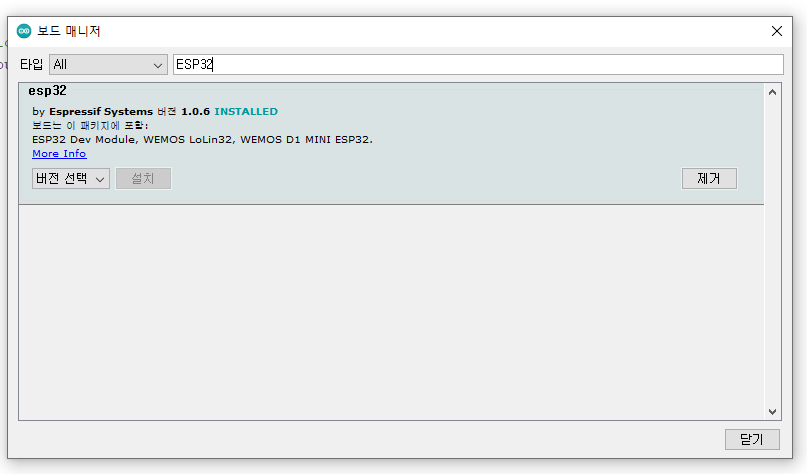
=> 환경설정에서 보드 매니저 설정
=> 툴-보드-보드 매니저에서 ESP32를 입력해서 해당 보드를 설치
=> 알맞은 포트 선택
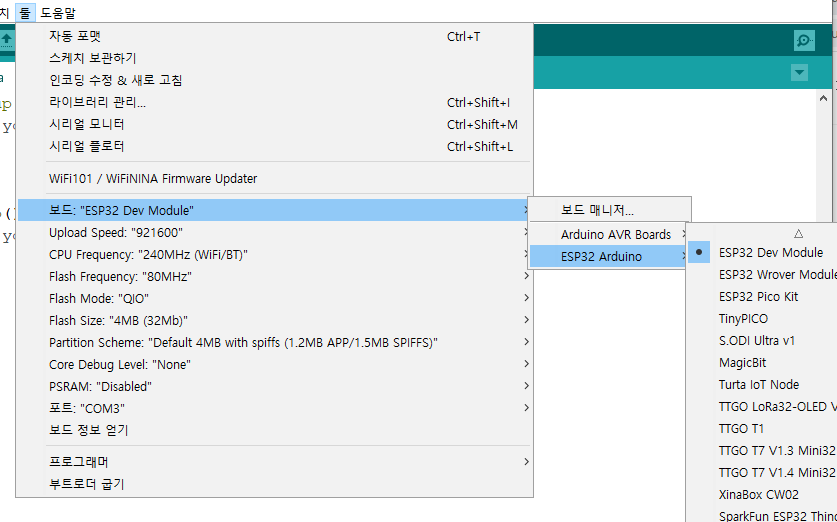
=> 보드 선택
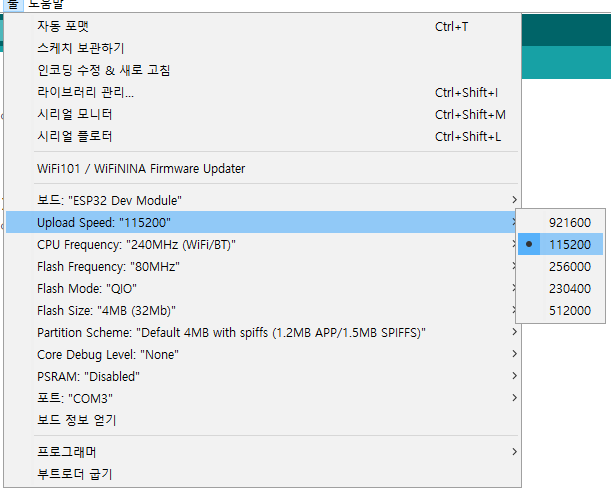
=> 컴퓨터와 보드 통신속도 선택
LED 배선
코드


아날로그 출력 (PWM) 채널 설정
- ESP32에는 16개의 독립적인 PWM 채널 지원
- 사용하고자 하는 채널의 PWM 주파수 설정 충분
LED 2개 연결 후 analog
코드


조도센서
코드


ESP32 보드 와이파이 설정
시리얼 모니터 출력 => 시리얼 모니터 출력
코드더보기#include <WiFi.h> #include <HTTPClient.h> const char* ssid = "heon"; const char* password = "12345678"; String result = ""; void setup() { Serial.begin(115200); WiFi.begin(ssid, password); while (WiFi.status() != WL_CONNECTED) { delay(500); Serial.println("Connecting to WiFi.."); } Serial.println("Connected to the WiFi network"); } void loop() { if ((WiFi.status() == WL_CONNECTED)) { //Check the current connection status HTTPClient http; http.begin("http://project-student.ddns.net/nayeho/Exam00"); //Specify the URL int httpCode = http.GET(); //Make the request if (httpCode > 0) { //Check for the returning code Serial.println(httpCode); result = http.getString(); Serial.println(result); } else { Serial.println("Error on HTTP request"); } http.end(); //Free the resources } delay(1000); }


서버 통신
프로젝트 생성
IPv4 255.255.255.255 localhost
=> 32비트
IPv6 :1 localhost
=> 128비트
아이피 주소 확인법 => cmd창에서 ifconfig_ IPv4 주소
서블릿 코드
package test; import java.io.IOException; import java.io.PrintWriter; import javax.servlet.ServletException; import javax.servlet.annotation.WebServlet; import javax.servlet.http.HttpServlet; import javax.servlet.http.HttpServletRequest; import javax.servlet.http.HttpServletResponse; @WebServlet("/Exam00") public class Exam00 extends HttpServlet { protected void service(HttpServletRequest request, HttpServletResponse response) throws ServletException, IOException { response.setCharacterEncoding("UTF-8"); response.setContentType("text/html; charset=UTF-8"); PrintWriter out = response.getWriter(); out.print("2022년 02월 14일 해피 발렌타인 데이"); } }
아두이노 코드
#include <WiFi.h> #include <HTTPClient.h> const char* ssid = "heon"; const char* password = "12345678"; String result = ""; void setup() { Serial.begin(115200); WiFi.begin(ssid, password); while (WiFi.status() != WL_CONNECTED) { delay(500); Serial.println("Connecting to WiFi.."); } Serial.println("Connected to the WiFi network"); } void loop() { if ((WiFi.status() == WL_CONNECTED)) { //Check the current connection status HTTPClient http; http.begin("http://121.147.52.204:8081/IoT/Exam00"); //http.begin("http://project-student.ddns.net/nayeho/Exam00"); //Specify the URL int httpCode = http.GET(); //Make the request if (httpCode > 0) { //Check for the returning code Serial.println(httpCode); result = http.getString(); Serial.println(result); } else { Serial.println("Error on HTTP request"); } http.end(); //Free the resources } delay(1000); }


JSON을 통해 LED 전구 제어
서블릿 코드
더보기=> Servlet에서 0과 1을 통해 전구 키고 끄기 가능package test; import java.io.IOException; import java.io.PrintWriter; import javax.servlet.ServletException; import javax.servlet.annotation.WebServlet; import javax.servlet.http.HttpServlet; import javax.servlet.http.HttpServletRequest; import javax.servlet.http.HttpServletResponse; @WebServlet("/Exam01") public class Exam01 extends HttpServlet { protected void service(HttpServletRequest request, HttpServletResponse response) throws ServletException, IOException { response.setCharacterEncoding("UTF-8"); response.setContentType("text/html; charset=UTF-8"); PrintWriter out = response.getWriter(); out.print("{\"led\":\"1\"}"); } }=> 아두이노 시리얼 모니터 화면
아두이노 코드
더보기#include <WiFi.h> #include <HTTPClient.h> const char* ssid = "heon"; const char* password = "12345678"; String result = ""; void setup() { Serial.begin(115200); WiFi.begin(ssid, password); while (WiFi.status() != WL_CONNECTED) { delay(500); Serial.println("Connecting to WiFi.."); } Serial.println("Connected to the WiFi network"); } void loop() { if ((WiFi.status() == WL_CONNECTED)) { //Check the current connection status HTTPClient http; http.begin("http://121.147.52.204:8081/IoT/Exam01"); //http.begin("http://project-student.ddns.net/nayeho/Exam00"); //Specify the URL int httpCode = http.GET(); //Make the request if (httpCode > 0) { //Check for the returning code Serial.println(httpCode); result = http.getString(); Serial.println(result); } else { Serial.println("Error on HTTP request"); } http.end(); //Free the resources } delay(1000); }

728x90
'비전공자의 코딩일지' 카테고리의 다른 글
| 비전공자의 IoT 국비 교육 수강일지 Day_44 (0) | 2022.02.21 |
|---|---|
| 비전공자의 IoT 국비 교육 수강일지 Day_40 (0) | 2022.02.15 |
| 비전공자의 IoT 국비 교육 수강일지 Day_38 (0) | 2022.02.11 |
| 비전공자의 IoT 국비 교육 수강일지 Day_37 (0) | 2022.02.10 |
| 비전공자의 IoT 국비 교육 수강일지 Day_36 (0) | 2022.02.09 |
'비전공자의 코딩일지' Related Articles
more


Comments